simple steamed fish

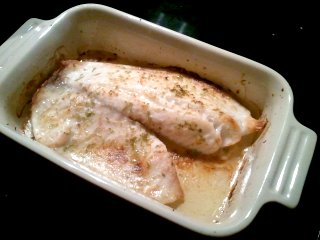
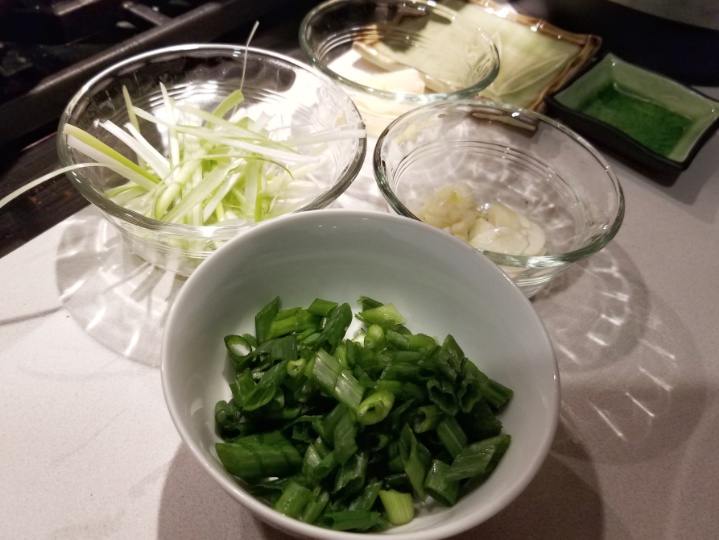
K cooks a perfect steamed fish. It’s a simple process: start by going to the fish counter at the nearest Asian grocery store. Pick a white fish, of a size that fits comfortably in your steamer. Make sure the eyes are clear. (Cloudy eyes = old fish.) Ask the guy behind the counter to clean it for you. Take it home, scrape off more scales if you need to, snip off the fins if they’re still there. (I love eating fin, but only when deep-fried.) Season lightly, inside and out, with soy sauce, sliced garlic, matchsticks of ginger, cut scallions. Place in steamer, cover, and steam until the flesh is flaky and opaque. Serve whole, in the middle of the table, where everyone can reach it.

chopped scallions, ginger, and garlic

K’s mother goes one step further by drizzling hot oil over the fish when it comes out of the steamer, crisping the skin. It’s delicious either way. Eat it over rice. The fish will come out swimming in a thin savory sauce, and you’ll want to drip that sauce over each bite of fish and rice. 

Our older kid loves fish. He’s gotten to be a pretty good eater; he will eat (or at least try) most foods, though he does complain when he sees a vegetable reappear that he hadn’t liked the first time around. The little one tends to flat-out refuse foods that she doesn’t want, but hopefully she’ll come around. Anyway, we must not have had whole fish in a while – maybe a couple of months, which is a long time for a three-year-old – because she was dramatically shocked to see us disassemble it, splaying it apart to reach the meat, pulling away the spine with the ribs attached, digging into the head for the tender cheek. We’ll have to have whole fish more often, I think; it’s good to be reminded of where meat comes from.

One of the things I love most about eating whole fish is that you get to enjoy all of your favorite bits in the same meal: the melt-in-your-mouth cheek, the fatty collar, the soft belly, the generous meaty flesh around the ribs. There are also the bits that are harder to eat, where the meat is interwoven with thin translucent bones that sneak into your mouth and poke your tongue and cheeks like tiny needles. You have to eat small, cautious bites, find the bones with your tongue, and spit them out. It’s a slow and messy process, not graceful at all, and utterly worth it.

Looking back, there must have been quite a lot of steamed fish in both of our childhoods, because whenever we eat it, we can hardly stop telling stories to one another. K remembers walking in on his grandmother blending white fish meat into rice, hiding it so that some of the more fish-averse kids wouldn’t know what they were eating. (We tried this technique on our daughter. It didn’t work; she complained that her rice tasted of fish and refused it. Oh well. At least her palate is good?) 

For me, whenever I pick the fish meat oh-so-carefully out of the smaller bones, I find myself thinking of my mother and grandmother. My mother loves cooking salmon heads, then picking out all the lovely meat from the tiny crevices. “Can you believe it,” she would say, “fish heads for such a low price! People just don’t know how good they are!” (Her salmon heads really are delicious; I’ll have to get the recipe.) And when we ate fish with my grandmother, she would remain at the table, still eating, long after everyone else was done. We kids would have drifted off, having eaten our fill of the easy meat, but my grandmother would sit patiently and delicately nibbling at the smallest bones, extracting and savoring every last morsel. I can see her clearly in my mind’s eye, alone at the table, chopsticks hovering by her mouth as she worked the fish through her teeth, straining meat from bone.

During dinner, I felt a bone scrape briefly as it slid down my throat and I was suddenly reminded of being a little kid in a restaurant, a thin fish bone lodged in my airway, gulping water to wash it the rest of the way down. My grandfather had been very patient and encouraging, soothing me and talking me through my panic, until at last I was able to breathe and swallow comfortably – at which point I went back to eating, albeit more carefully. I related this story to K, laughing: “If you go through something like that as a kid and you still go back to eating fish, there’s no hope for you.”

I love to cook and eat a whole lot of different things (oh so many different things!), but for me, simple steamed fish and white rice is the dish that tastes like home.

steamed whole fish, ready to eat

(As a bonus, it’s below freezing outside, so hopefully the raccoons won’t smell the leftover fish bones in our compost bin.)

Chocolate chip cookies in a hurry (and CSA week 2)

This past Saturday, spring finally came stumbling in; when we woke up, there was still a layer of snow coating the ground, but by afternoon everything was balmy and sunny and we could finally see all of our (brown) grass again.

Although we had fresh CSA goodies, not many of them got cooked; we had Pi Day and St Patrick’s Day to contend with, and we have traditions to uphold. I made hand pies and an apple pie for Pi Day, and good old corned beef and cabbage (with potatoes and rainbow carrots) for St Pat’s.

The goodies from week 2 of the CSA (most of them still waiting in the fridge): oranges, sweet potatoes, tangerines, Granny Smith apples, onions, brussels sprouts, beets, kale, garlic, eggs, and bread (Breadery sourdough).

The baby is posing next to the vegetables. For scale.

We used up the kale in a massaged kale salad (with tangerines and apples), and the beet greens got cooked up in some fat that I skimmed off our delicious short ribs (from Carroll Farm to Table; I’ll talk about them some other time), but otherwise most of the pickup is still sitting in the fridge.

The other reason I’m behind on dealing with the CSA bounty is that it’s been a rough couple of weeks; we’ve all been fighting runny noses and sore throats for some time now, but last week the baby got a fever… and then the Little Prince got a fever… and then the baby got a fever again. On top of the nasal congestion and coughing, too. Poor kids. Hopefully we’re near the end of this round of illnesses.

When you’re a worn-down, tired parent, sometimes you just want a homemade chocolate chip cookie. This is how you get one within fifteen minutes, warm from the oven, with minimal effort:

1) go back in time and make a batch of chocolate chip cookie dough. I used smitten kitchen’s recipe. Heck, double the batch; you never know when a cookie emergency will strike.

2) scoop the cookie dough into balls and pack the balls on a cookie tray, lined with a silicone baking mat (or parchment paper, if you don’t have one). You can crowd the dough balls pretty tightly; just make sure they’re not touching. I use a cookie scoop for minimal fuss.

3) the next morning, put your frozen cookie dough balls into a freezer bag. They won’t stick together because they’re frozen.

4) time travel back to the present. When you’re feeling downtrodden and tired, take two or three (or more, I won’t judge) dough balls out of the bag and put them on your oven tray. Pop them in the preheated oven and wait 15 min, or until they’re baked. (Cooking time varies with oven but when the cookies are flat and a little brown around the edges, I call them done.)

5) make yourself a hot chocolate and sit down with a handful of freshly-baked, perfect little cookies, crispy on the outside but still gooey on the inside. Close your eyes and take a deep breath. Life is good.

This technique will work for almost any cookie recipe, not just chocolate chip; it’s also how I managed to execute some pretty impressive cookie platters this past holiday season. Our neighbors were impressed by how I managed a variety of freshly-baked cookies, with two young kids at home. I merely smiled and mumbled something about good time management. Now all I need is more freezer space.

furlough ramen

Have you heard of canned Vienna sausages? They’re tiny little cylinders made of a smooth meat paste, so processed that it’s all a uniform color and texture. They’re soft, salty, and squishy on the tongue. My parents always had a few cans around while I was growing up; I was always fascinated by how the seven cylinders fit neatly into a can, and when I was a kid, I enjoyed trying to remove one without damaging the others. The first one was always the hardest.

Vienna sausages

They’re dirt cheap and last forever on the shelf; they don’t even need heating (though heating does help). If I were stocking up food for the apocalypse, I would make sure I had a shelf full of these. But I only had one can at home, bought as a joke a year or two ago.

Last night, as the government shutdown loomed, I decided to embrace frugality and finally use up those Vienna sausages on some ramen (another classic budget food). I also added kale and a poached egg.

furlough ramen

It was surprisingly good. I started by dumping some stock cubes from our freezer into water: mushroom stock, chicken stock, and a smidge of duck stock. Then, when the liquid was at a rolling boil, I dropped in torn kale and cooked it until it was soft but still bright green. Out with the kale and in with the ramen; when the ramen was cooked, it came out as well, and in went eggs and Vienna sausages. The sausages heated in the time it took the eggs to poach.

Okay, it’s not dollar ramen; the noodles were actually thin egg noodles with shrimp eggs. They’re my favorite dried noodle from Lotte. Also, dropping the Vienna sausages in the broth was only meant to warm them, but it actually helped the flavor by washing off the salty brine. And, gourmet ramen and all, I think I fed the family for under five dollars.

fish tacos!

Whenever I think of fish tacos, I remember eating them in San Diego, when we met a friend for dinner by the pier. The place was so crowded and noisy that we were almost certain we wouldn’t get a table, but we squeezed between the patrons and managed to find a place to sit. Salty air blew through the windows from the ocean, and the light changed gradually as the sun set outside. I had a great time. It was the perfect place to eat a fish taco.

So it’s a pity that the tacos themselves were pretty forgettable. Fried and battered fish fillets, probably with lots of shredded cabbage, tomato, and sour cream. Nothing special.

But these fish tacos, homemade in Maryland? They’re so much better. They’re everything the San Diego tacos should have been. And when I eat them, they taste like summer and sunshine.

summery fish tacos

These fish pieces are baked, not fried; however, because they’re individually dredged in flour, they still have a nice dry outer shell. (That was K’s idea; I was just going to broil fish and slice it after. This took a little extra time, but it works so much better.) We didn’t have cabbage and tomatoes aren’t in season, but we used pickled vegetables for crunch (another of K’s brilliant brainwaves) and red bell pepper for color. The result is colorful, delicious, and perfect for summer.

You’ll need:
3 tilapia fillets
flour
cornstarch
oil
1 lemon, cut into wedges (a lime would also work)
1 red bell pepper, sliced small (we would have used tomatoes, but they’re not in season yet)
small corn tortillas
sour cream
pickled carrot and daikon radish
cilantro, washed and roughly torn

Prepare a shallow bowl of equal parts flour and cornstarch. If you want, season this with a little cayenne pepper. In the oven, position a rack about 12″ underneath the broiler element, and set the broiler to HI.

Cover a cookie sheet with tinfoil and oil it lightly.

Cut each tilapia fillet in half lengthwise, then slice it into strips, working against the grain where possible. Dredge these strips in the flour mixture, then lay them on the prepared baking sheet.

Sprinkle some salt and pepper over the strips, and drizzle with lemon juice. Stick the pan underneath the broiler until the fish are done. I just break one apart to see if it’s cooked inside. The outsides will be crispy, and the insides will be white and firm. It won’t take long.

On another pan, stick some tortillas inside the oven to toast. Don’t let them overcook; you want them to be warm and just starting to crisp, but still flexible enough to bend. If you forget they’re in there, you’ll have tortilla chips in no time. (In which case, I suggest making some guacamole.)

To assemble a fish taco: layer fish strips, bell pepper, pickled vegetables, cilantro, and sour cream into a tortilla in whatever order you like. Finish with a squeeze of lemon juice. Enjoy.

spring CSA week 2, and pi day

People are getting back into their usual patterns; I went to Breezy Willow at my usual hour, and the crowds were nowhere to be seen. I messed up twice on the week 2 pickup though — I didn’t pick up my red delicious apples, and I seem to have entirely skipped the tangerines. I like that Breezy Willow lets you pack your own produce, because then you can get the sizes you want (I like smaller apples, smaller brussels sprouts, and straight thin carrots). However, if you skip over something in the confusion of packing, it’s your own fault. They’re usually pretty good about letting me pick up a little extra the next week to make up for it, but it’s not the same…

Anyway, week 2’s haul consisted of: turnips, acorn squash, brussels sprouts, oranges, potatoes, onions, and apples (Jonagold and, if I had remembered them, Red Delicious); also oranges (but no tangerines!) and the usual eggs and bread (I chose wheat).

spring CSA, week 2

Last week also brought Pi Day, the 14th of March. I’ve been a fan of Pi Day since I was in high school, lo these many years ago, and it always brings a smile to my face. Halfway through the day, it occurred to me to surprise K with pie for dinner. Unfortunately, I hadn’t planned ahead and defrosted my pie fillings (I turned a couple of bushels of apples from last year’s farmer’s markets into frozen pie filling) or made any pie dough. I did some quick brainstorming, and came up with a quick-to-execute pie-themed meal. Puff pastry to the rescue!

Chicken pot pie is essentially a thick chicken stew underneath a pie crust. On the way to pick up the kid from daycare, I swung by the grocery store and picked up two rotisserie’d chicken leg quarters*, a can of cream of chicken soup, and a box of puff pastry. Once home, I stripped the meat off the bones and roughly chopped it. I also diced a couple of hard boiled eggs (I figured it was kind of like potatoes, and took less time to prepare). I layered chicken, egg, and mixed frozen vegetables inside buttered ramekins. Then I mixed the can of cream soup with an equal amount of milk, and poured it over top. By this time, the puff pastry was defrosted and was easy to work with. I stuck a circle of puff pastry over top of each ramekin, baked at 350 until the pastry was golden and puffy, et voila: quickie chicken pot pie.

Apple pie is one of my favorite pies, but there’s no real way to hurry up a whole pie. You can, however, make hand pies with puff pastry. So I diced up one of the CSA apples (didn’t even bother to peel it) and tossed the pieces with cinnamon, sugar, a bit of lemon juice, and a few scrapes of nutmeg (just eyeball it; enough sugar and you can’t go wrong). A square of puff pastry on the bottom, apples in the middle, and another square on top, squishing the edges together with my fingers, and into the oven as well… and when the pastry was golden and puffed, we had apple hand pies for dessert.

Pi Day pies

Thank goodness for puff pastry, which makes anything look like a pie. A meal centered around puff pastry is probably not the healthiest thing in the world, but Pi Day only comes around once a year.

* The two leg quarters cost $4.49; looking back, I should have gone to Costco and gotten a whole rotisserie chicken for $4.99. Oh well, it did the job.

Impromptu heart-shaped scones

Scone recipes are essentially quickbreads, which means that they’re leavened with something other than yeast (baking powder / baking soda, usually). They’re convenience items, the benefit being that they come together easily and without too much fuss, and you don’t have to wait around to eat them.

heart-shaped scone

Today is the kid’s first Valentine’s Day at daycare, and I wanted to make something for his teachers. (His fellow classmates being one year old, I thought they wouldn’t care much about valentines. Turns out I may have committed a social faux pas; he got a valentine from one of his classmates this morning. I’m sure the kids won’t notice the lack of valentines from my son, but hopefully the other parents forgive me. It’s my first kid! I’m still learning daycare etiquette.) Anyway, because his daycare has a strict no-nuts-on-premises policy, I went with dark chocolate chips and dried cranberries in the scones.

Baking the scones turned into a substitution frenzy. My go-to recipe for sweet scones used heavy cream, which I didn’t have in the fridge; however, I had plenty of milk, so I turned to my go-to recipe for savory scones instead, since it used buttermilk. (I didn’t have buttermilk either, but if you let a tablespoon of vinegar sit in a cup of milk for about ten minutes, you get a decent curdle.) I upped the sugar content and reduced the salt, and sprinkled the scones with demerara sugar before they went into the oven.

The resulting scones baked up okay, but they still looked a little too hearty for Valentines Day, so I melted down some more chocolate chips and piped the chocolate into heart shapes on top of the scones for a festive touch.

finished scones

You know, it probably would have been less effort if I’d just filled out paper valentines. But this way made extra, so K and I also got something sweet to nibble on the way to work. I call it a win.

Chocolate Cranberry Scones

Note: these were fine as is, but I wouldn’t have minded if they were even sweeter (it is Valentine’s Day after all). Next time, I’d increase the sugar further, to 1/3 cup or even 1/2 cup, and perhaps add a teaspoon of vanilla when mixing in the buttermilk. Also, more chocolate chips never hurt anybody; I’d probably throw in another handful of those too.

Makes about 8 heart-shaped scones

2 3/4 cups flour
1/4 cups sugar
2 1/2 tsp baking powder
1/2 tsp table salt
1/2 tsp baking soda
1 1/2 sticks (12 tbsp) unsalted butter, cold, cubed
1/2 cup dried cranberries
1/2 cup chocolate chips
1 cup buttermilk

2 tbsp milk, for brushing
crystallized sugar, for sprinkling
1/4 cup choc chips, for melting and piping

Preheat oven to 400.

Combine the flour, sugar, baking powder, salt, and baking soda. Using a pastry cutter, cut in the butter until the mixture looks like damp sand. Mix in the dried cranberries and chocolate chips, and then stir in the buttermilk until just combined.

On a floured surface (I like sprinkling flour on a Silpat), flatten the dough about 1 to 1 1/2 inches thick and cut desired shapes. You can gather scraps and cut them out again, but the first batch will be the most tender. Arrange scones on a prepared surface (another Silpat or a greased pan), brush with milk and sprinkle on some crystallized sugar, and then bake 15 to 20 minutes or until scones are golden-brown and tasty-looking.

Cool on a rack. Meanwhile, melt chocolate chips in the microwave (cautiously — I go 10 to 30 seconds at a time, stirring after each interval). Pour the melted chocolate into a small plastic bag and snip a tiny hole in the corner. Pipe chocolate onto cooled scones, and stick them in the fridge until the chocolate hardens up.

Or you could just eat them right away. I won’t judge.

spinach garlic soup / world’s worst food blogger

I’ll get to the spinach garlic soup in a minute.

See, my friend was talking about his blog, and how he never updated it because it felt too much like work (he researches things and then writes about them for a living), and therefore he felt he had underperformed as a blogger.

“It’s okay,” I said by way of consolation, “I’m a horrible food blogger myself.”

“I’m sure you’re not,” he said, rather automatically.

“I am! I haven’t updated my food blog for months, and it’s been silent between Thanksgiving and Christmas. What kind of food blog is silent between the two biggest food holidays of the year?”

He thought about it. “Yep,” he said, “you are the world’s worst food blogger.”

So there you go. Welcome from the world’s worst food blogger. I have a ton of catching up to do; I think I trailed off before the closing weeks of the CSA, so I’ll need to dig those pictures up from somewhere. Also, I went crazy at the last farmer’s markets of the year (great deals!), and hopefully the bushels (!) of apples in my basement are still doing okay. And my last post is of the kid’s food purees, which seems like forever ago; now, the kid is working on his first tooth, and will enthusiastically gum up rice crackers, Cheerios, and anything he can grab off my plate. Things change fast when babies are concerned.

Anyway, if your holiday season was anything like mine, it was full of overindulgence. Our many dinners with extended family starred delicious pulled pork, brisket laced with chipotle, lamb roasted on the bone, and Peking duck. The dessert plates were even more deadly, with all manner of cookies, candies, and cakes, as well as fireplace s’mores. The waistlines of my pants still fit, but – let’s be honest – rather more tightly than before. So when the New York Times posted up a recipe for Garlic Soup with Spinach, I was excited. A soup with garlic and spinach sounded like a wonderful antidote to all the fat and sugar that I’ve been consuming.

However, after reading it through, the recipe didn’t sound all that good to me. Just two to three cloves of garlic, for four servings? That was hardly enough garlic to justify the name. And what was with the elbow macaroni and the eggs?

So I made my own, with much more garlic, sauteed a little for extra flavor, and a big bag of frozen chopped spinach. The tang from the garlic permeates the soup, the spinach makes you feel healthy, and the turkey stock still made it feel like it belonged in the holiday season.

Spinach Garlic Soup

A generous amount of garlic, minced (I used six or seven fat cloves. I love garlic.)
A pat of butter and a glug of olive oil
About 4 cups of turkey stock (really, any stock would do)
A 16 oz bag of frozen chopped spinach
A handful (about 1/4 cup) of shredded Parmesan cheese

In a saucepan on medium-high heat, melt the butter into the olive oil. Throw in the minced garlic and let it sizzle for a minute or two, stirring every now and then, until the garlic is cooked but not brown, and the entire kitchen smells sharp and fragrant. Then pour in the stock and bring to a boil. Add the spinach to the boiling stock and cover; let it cook for about five minutes, or until the spinach is cooked through. Then take off the heat and stir in the cheese. Salt and pepper to taste. Serve with a little sprinkle of extra cheese on top.

We had ours for breakfast, with potato pancakes. (The potato pancake mix was part of a Christmas present from family in Wisconsin — I love food-centric gifts).

spinach garlic soup with potato pancakes

The kid liked the soup so much that I made it again, throwing in some Israeli couscous and letting it cook up before adding the spinach. This soup is so easy to make that I think I’ll be making it regularly throughout the winter. Maybe even with elbow macaroni. I’m still not sold on the eggs though.

it was delicious! I made it with fish!

A long time ago, while poking around on Allrecipes, I came across one particular review which stuck in my mind. The recipe was for tuna brushed with soy and coated with sesame seeds, lightly seared so that it was cooked on the outside but still raw in the middle; one reviewer gave it five stars and noted: “it was delicious! I made it with chicken tenders!”

Thinking about sesame-coated raw chicken still gives me the shivers.

Anyway, I thought of that review last night when I was making tilapia. I usually make tilapia with lemon and dill, but I had neither. Instead, I had a single tiny lime, and while brainstorming ideas, it occurred to me that Thomas Keller had a truly delectable recipe for creamed corn that involved lime and cayenne pepper. I know, fish and corn are not the same, but it seemed like a decent jumping-off point. Why not try the same flavor combination with fish?

So I did. The fish turned out very good, tangy (lime) and spicy (cayenne) with a lovely creamy background (butter and the tilapia). It’s a very good dish for summer. I gave K a taste when he came home, and he went digging into the leftovers for more. Success!

(As a bonus, this dish is very easy to put together even when a not-so-small infant is rolling around on the kitchen floor, getting underfoot and demanding attention.)

tilapia with lime and cayenne

Tilapia with Lime and Cayenne

Unfortunately I didn’t measure my quantities, so your guess is as good as mine.

Ingredients:
3 tilapia fillets
one small lime, zested and juiced
butter
salt
cayenne pepper

Directions:

Rub three small individual roasting dishes with butter. (Or rub a single big pan with butter.) Sprinkle the fillets lightly with salt on either side, and lay them into the roasting dishes/pan.

Squeeze some lime juice over each fillet and sprinkle with lime zest. I used about half of the juice for three fillets. (I made the rest into limeade.)

Very lightly dust the tops with a little cayenne pepper. Go easy; a little cayenne goes a long way.

Dot the fillets with tiny pats of butter.

Put the roasting pans into the oven, under the broiler. Check occasionally for doneness; when fish is done, it flakes when prodded by a fork. Mine were done with the outer edges were beginning to brown and crisp.

Eat and enjoy! I had my fillet over rice, with buttery drippings poured out of the pan.

BBT sandwiches

Yesterday, while roaming the kitchen, I caught a glimpse of a beautiful meaty tomato sitting on the countertop. There are few things as wonderful as a perfectly ripe tomato at the height of summer, and suddenly I felt the need for a tomato sandwich. I turned to K. “I’m going to make a tomato sandwich with mayonnaise and basil,” I announced. “Want one?”

“With bacon?” he said, hopefully.

“I don’t want to go to the trouble of frying up bacon,” I said. “I want a sandwich now.”

“I’ll make bacon,” he said.

“In that case, I’ll wait for the bacon.”

It was worth it.

BBT sandwich recipe:
(BBT = bacon, basil, and tomato; recipe makes two sandwiches)

Assemble the ingredients: Toast four slices of bread and fry up four slices of bacon until crisp. Cut a ripe tomato into slices. (Thick slices, not those paper-thin translucent doilies of tomato that you get in fast-food restaurant burgers.) Wash a few leaves of basil and cut a garlic clove in half.

Assemble the sandwich: Gently rub one side of the toasted bread all over with the cut side of the garlic clove. (If you’re not gentle, you might rip the surface of the toast.) Spread mayonnaise onto the garlic side of the bread; use as much as you want. On one piece of bread, put down the basil leaves and cover with a layer of tomato slices. Crack some fresh pepper over the tomato. Top with a layer of bacon and the second piece of bread.

Eat. The bacon is crunchy, the tomato is sweet and juicy, the basil adds depth, and the garlic tang lingers after each bite. This is what summer tastes like. Make these now. You won’t regret it.

(No, of course there’s no picture. I didn’t take any pictures; I just ate the sandwich. No sane, hungry person would pause to take a picture before eating this sandwich.)

PS: The tomato in question was a purple Cherokee, from a friend’s garden. It’s a delightfully meaty tomato, with little in the way of seedy goop; great for sandwiches.