Looking Back on Vegan Month

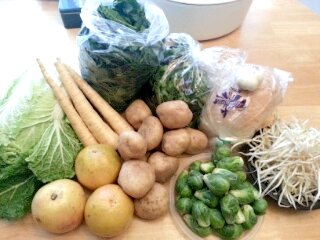
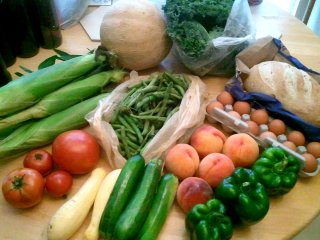
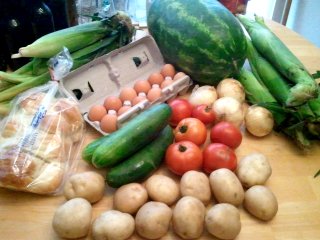
We ate strictly vegan for the entire month of April. K talked me into it; he thought (correctly) that if we didn’t go all out, we’d make do with half measures and wouldn’t try really new things. He was also partially inspired by J. Kenji Lopez-Alt, who goes vegan for a month every year at Serious Eats, and by the fact that we’ve recently seen some vegan chefs whip up deliciousness out of very little on cooking shows. We only slipped up a few times, and by accident; once I absentmindedly put honey in my tea, and he ate a couple of chips before realizing that they had dairy ingredients. We continued to cook meat for the kids, but washed out the pans and utensils before using them to cook our food. It’s been a couple of weeks since vegan month ended, and these are my takeaways:

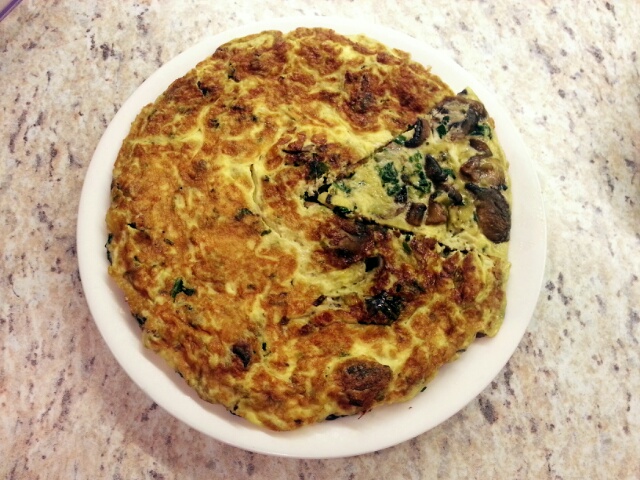
– I thought I would miss steak and bacon. Instead, I missed eggs and tiny fish. I found mushrooms and tofu to be meaty and flavorful enough, and smoked paprika was a pretty decent flavor stand-in for bacon, but there’s no substitute for a perfectly runny egg or the briny punch of an anchovy. When the month ended, the first meat protein I ate was a single smoked sardine, right out of the jar.

– That said, I found that our vegan dishes tended to be incredibly flavorful. Maybe this was a function of how we cooked, but we’ve found that meat tends to provide a shortcut to deliciousness, whereas it needs to be coaxed out of vegetables a little more. When vegetables show up with flavor, though, it’s absolutely killer.

image: portobello cap with Brussels sprouts, sauteed greens, and mashed potatoes; two mixed green salads with roasted cauliflower, mushroom, and tomato; cauliflower and chickpea curry over rice.

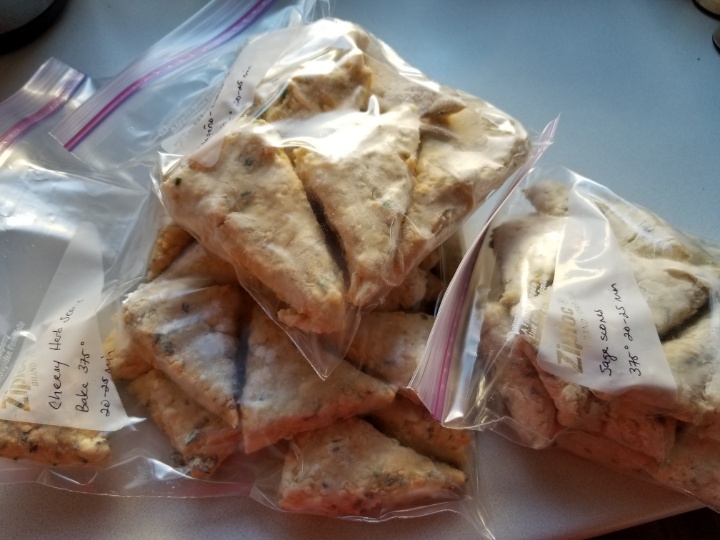
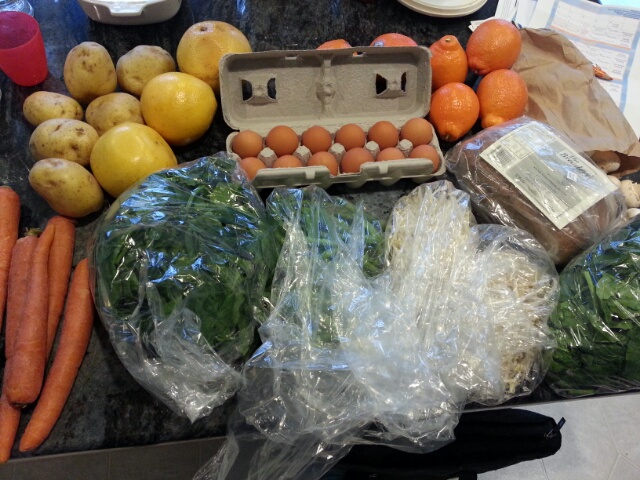
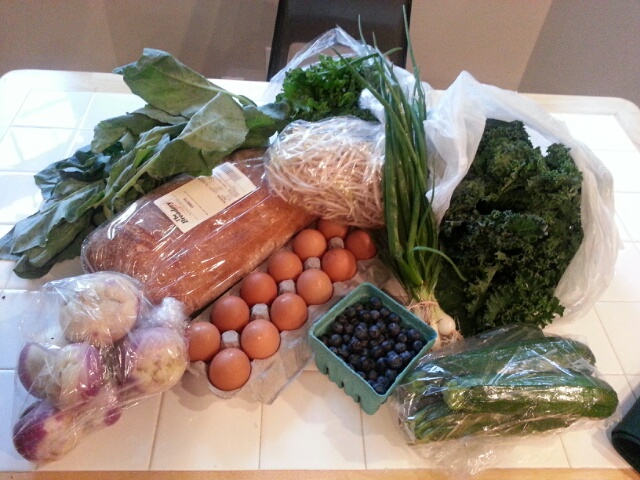
– On weekends we cook for the week ahead; in the pre-vegan times this meant having cooked meat, cooked veg, and starch in the fridge ready to assemble and reheat. Obviously this had to change for vegan month; after some less-than-successful attempts to recreate the previous system, I found that I loved seasoning and cooking elements separately (mushrooms, cauliflower, sweet potato, tofu, etc) and then just having the little flavor bombs sitting in the fridge ready to go. All we had to do was put a few spoonfuls of each onto rice, salad greens, or beans, and the combination immediately became complex and savory, new flavors in every bite.

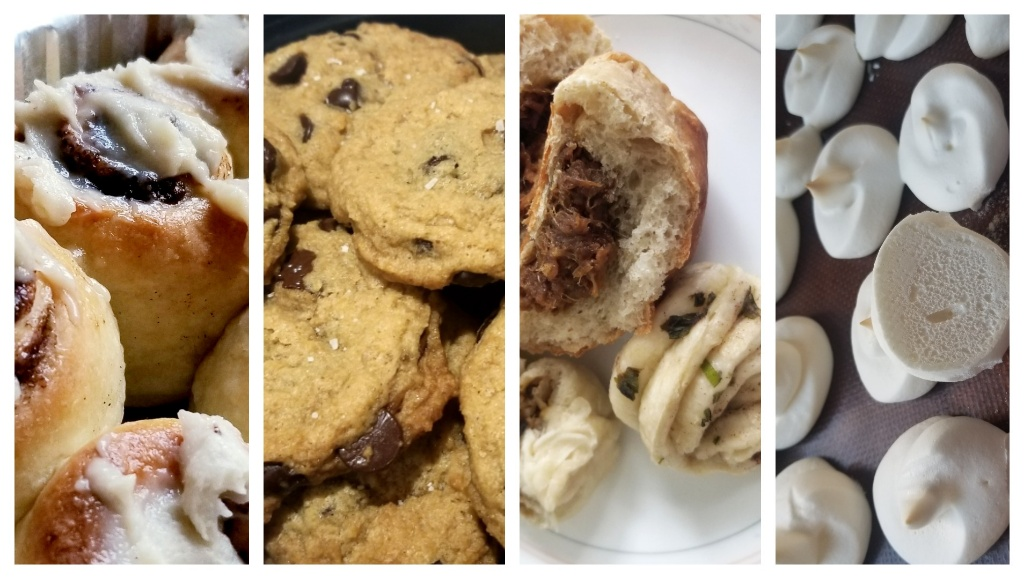
– Trying vegan dessert recipes was a disaster; generalizing from the two (well-reviewed!) “vegan dessert” recipes I tried, anyone writing dessert recipes from a vegan/health perspective doesn’t know what real dessert is supposed to taste like. Instead, I took my brother’s advice: start with normal recipes and substitute accordingly. I used sticks of plant-based “butter” in place of actual butter; almond or coconut milk instead of dairy; and flax meal and water for egg. Those substitutions managed to turn out delicious cookies, cakes, muffins, enriched breads, and filled bao (with char siu jackfruit filling) without having to make further compromises. Also, meringues made out of aquafaba (chickpea water) turned out amazingly well.

4 images: cinnamon rolls, chocolate chip cookies, char siu bao and scallion flower roll, aquafaba meringues

– DUMPLINGS. What a game changer. In the past I’ve only ever wrapped dumplings with a pork-based filling, and it was always a little nerve-wracking; I’m super germ-conscious, and very careful about washing my hands, sanitizing surfaces, and segregating items that touched raw meat away from items that haven’t. However, with a dumpling filling based on tofu/wheat gluten/mushrooms/cabbage, well-seasoned and even cooked beforehand, I felt all my worries melting away. I made dumplings with gleeful abandon. It was so freeing. I may never make raw meat dumplings again, I am completely serious. It’s not worth the stress, especially when there’s so much flavor in the vegan ones.

image: a hand holding an unwrapped dumpling; vegan filling in the background; a line of filled, folded dumplings waiting to cook

– Overnight oats! I am an overnight oat convert. K made Alton Brown’s overnight coconut oats and they were so good, we didn’t even try any other recipes even though I’d bookmarked a bunch. I found them kind of weird and cold and goopy at first, but the recipe we used was so fragrant with coconut and almond that it drew me in. My grab-and-go breakfast used to be a baked item (bun, croissant, muffin) and a boiled egg; I would usually be quite hungry by lunchtime. Now I actively crave overnight oats, which I serve myself with frozen berries and a sliced banana, and I’m only slightly hungry by noon. All hail overnight oats. We’ve continued eating them well past the end of April.

image: a bowl of overnight coconut oats topped with sliced banana, frozen blueberries, and oat-and-seed crunch

Now that we’re well into the post-vegan-month period, I think some changes have staying power; when cooking a quick weeknight meal, I used to reach for eggs as an easy protein, and now I reach for tofu or chickpeas instead (I’ll save the eggs for the good stuff). This past weekend, I made a typical weekend brunch (pancakes, eggs, bacon, fruit), and then felt that it was incomplete; after adding a hash with potato, onion, and diced colorful peppers, the meal looked and felt a lot more appealing.

When cooking ahead for this week, we made a big dal tadka (cooked lentils flavored with spicy onions and tomatoes, honestly it’s kind of like a beany Indian congee), sauteed some chickpeas with spinach and peppers, and grilled up a bunch of asparagus, mushrooms, and tofu. We (really, K) also grilled a single steak, which we’ve shared among the four of us, and we also made some soy sauce chicken drumsticks for the kids. The fridge is also well stocked with roasted sweet potatoes (halved and roasted with salt, pepper, and smoked paprika, they are amazing), which go with anything. In the past we would have cooked up a big meat-centered dish and all the vegetables would have been dutiful afterthoughts. I’m definitely happy with how things have evolved (and so are my taste buds). Well done, K.

image: sauteed chickpeas with spinach and peppers; grilled asparagus, mushrooms, and tofu; a bowl of dal tadka

Thanksgiving leftover herb scones

Thanksgiving this year has been kind of odd for us. It’s one of my favorite food holidays, but by the time actual Thanksgiving (read: American Thanksgiving) hit, I was feeling a little bit of Thanksgiving fatigue.

We’d celebrated Canadian Thanksgiving back in early October with our family up here in Ottawa (turkey: smoked), then Thanksgiving II in early November with our wonderful friends back in Maryland who, bless them, hadn’t given us too much pushback on celebrating TG2 before TGprime (turkeys: smoked and fried). So by the time actual Thanksgiving rolled around (turkey: cut into pieces and roasted, with herbs), it was my third time within two months making mashed potatoes, cranberry sauce, and green bean casserole, and the whole thing was starting to feel a bit routine, just another turkey dinner.

On the other hand, thanks to practice, I had it down to a pretty solid process at this point. (Imagine this said in the Canadian manner, with a long “o”: Proe-cess.) Thanksgiving staples are quite forgiving; I actually cooked most of the sides ahead of time and reheated on the day of, so we only needed to worry about the turkey and gravy. (And the sticky rice made in the instant pot, which turned out fantastically moist and flavorful in under an hour. Warning: instant pot raving to come in another post.)

With only a couple of dishes to worry about, it was a delightfully relaxed Thanksgiving Day. And then we had a wonderful dinner with family (again) and one of K’s coworkers, and we have been eating pie for dessert for a week straight now; I can’t complain.

But on to the meat (so to speak) of this post: if you bought herbs to flavor your bird, or your sides, it’s likely that your post-Thanksgiving fridge contains partly-used packets of herbs. These herbs are generally destined for sadness — it really is hard to use up a whole bunch of herbs at a go, since recipes generally call for only a couple of sprigs at a time — and I have been guiltily throwing away dry, wilted brown herbs for years. But this year I was determined to change that.

I decided to modify my favorite jalapeno-cheddar scone recipe for the purpose. It’s a straightforward recipe: cut off part of a stick of butter and saute minced jalapeno in it, then toss that with a bit of flour and a couple of handfuls of shredded cheese; whisk 2 cups flour and 1 tablespoon baking powder, then cut in the remainder of the butter, mix in eggs (2) and cream (1/2 cup), then mix in the buttery pepper and cheese. It’ll make a dough, which you press out, cut up, and bake. Brush with egg wash if you want a glossy top.

So I washed and cut up the herbs, which was a very fragrant experience. This was actually the most time-consuming part; there were a lot of tiny leaves on those spindly stems.

image: mincing herbs

Then I got out a stick of butter. (Actually I cut off a quarter of a block of butter. Butter up here is mainly sold in solid 1-lb blocks.) I cut off a smallish chunk of it and let that brown slightly in a saucepan on the stove, then dropped in a good amount of mixed chopped herbs so that they would cook slightly and infuse the butter. (Maybe a half cup of herbs? I didn’t measure. This is a very forgiving recipe.) The rest of the butter got diced up and cut into a bowl with flour and baking powder.

image: incorporating butter

Then the liquids (eggs and cream, except I was running short on cream and had to cut it with milk, I told you this recipe was forgiving) and herbs got mixed in. When the ingredients formed a relatively cohesive dough, I dumped it out onto a floured surface and patted it into a flattish mound, then cut it up into triangles. Classic scone shape, triangles.

image: assembling dough; cutting triangles

Bake in the oven at 400 degrees for about 20 minutes; they’ll puff and turn golden, and the cut edges will be beautifully craggy. The egg wash is optional; all it does is make the scone look shiny. My tasters don’t seem to notice a difference. The image below has egg wash on the left, no egg wash on the right.

image: baked scones cooling on a tray

These scones were actually lighter than ones I’ve made in the past, since I finally realized that I’ve been misreading the recipe. It calls for three eggs in the ingredient list so I’d been putting three eggs in the batter, without realizing that the third egg was actually supposed to be reserved for the egg wash. This time I used two eggs as per the instructions, but next time I think I’ll go back to three per batch; I liked the more solid scone that resulted. (Forgiving recipe! I can’t say that enough.)

Ironically, it was this exercise of repurposing leftovers that made Thanksgiving feel real to me again, and not like I was churning out some repetitive performance. Because figuring out inventive ways to repurpose leftovers has always been a quintessential part of the Thanksgiving experience.

As a bonus, since I had enough herbs to make four batches of scones, now the freezer is stocked with flash-frozen unbaked scones, just waiting to be baked up for breakfast on some cold winter morning. Scones are always best right out of the oven.

image: frozen scones, bagged

Life is good.

when life gives you black raspberries

We’re moving in just a couple of weeks. I sit here, Wednesday night, amongst a pile of papers and things, in a house full of even more things, and packers are coming on Monday.

Any sane person would fall to organizing things: household goods shipment items over here, long-term storage stuff over there, stuff going to Goodwill in the basement, stuff going to the landfill in the garage.

So of course, I spent the evening making black raspberry jam.

You see, moving out of a house is actually when you get everything done that you’ve been putting off for years. New roof? Check. Install ceiling fan/light fixtures in every bedroom? Check. Clean out basement detritus? Check. Clean out the freezer, including those five quart-sized bags of black raspberries that you picked from Larriland Farm two summers ago?

frozen bags of black raspberries

Last time I made raspberry jam it had seeds in it, and they were crunchy and got stuck in one’s teeth and ruined everything with their mere presence, so I went to great lengths to de-seed the raspberries this time around. I cooked them a bit so that they were soft (did I mention they’d been in the freezer for two years?), then jammed (ha) them through a strainer with the back of a spoon, occasionally scraping the pulp off the bottom side.

the spoon and strainer setup

Then, not wanting to waste any of the black raspberry goodness, I wrapped all of the spooned-out pulp in a wad of cheesecloth, wrapped it up, and started squeezing.

cheesecloth and black raspberry pulp

Man was that a weird feeling. The raspberries were still warm, practically body heat, and the juice that flowed out was dark red and viscous, running stickily over my fingers. I really felt like I was squeezing out someone’s heart, extracting the blood.

I bet Hannibal canned his leftovers.

I’m sure this is the kind of thought that occurs to anyone making jam late at night.

Anyway. After that, the jam went back in the pot with some sugar, pectin, and lemon juice for the final boil. It was awfully pretty, watching the red swirl in the pot.

raspberry swirrrrrl

After a lot of boiling, and stirring, and near-misses (this stuff boils up really high and you don’t want spillover, it’s like napalm on your countertops), it was time to funnel it into the sanitized jars (thank goodness for the sanitize cycle on the dishwasher).

sticky funnel and jars

And, into the water bath they went. More boiling followed.

jam jars in the bath

I love these jar tongs. I’m so over the no-unitasker-allowed-in-the-kitchen thing. Look, you can even see that the lid’s sucked down. Successful seal accomplished!

jar of jam emerges

At the end of the night I hadn’t gotten any more packing or organizing or decluttering done. But I had turned stuff the movers wouldn’t take (hand-picked frozen black raspberries) into stuff that they would (sealed, shelf-stable jars of jam), so hey, it’s progress. I’m counting it as a win.

end of jamming night: 9 full jam jars

Though, there’s always more work to do.

actually, jamming night ends with washing dishes.

spring CSA, week 3

week 3 of the spring CSA: gold potatoes, carrots, ruby red grapefruit (3), minneolas (6), spinach, green beans, bean sprouts, mushrooms (in the brown paper bag), eggs, and bread (Breadery cinnamon raisin walnut).

spring CSA, week 3

Already cooked (though not yet eaten): all of it! This past Saturday I decided that I was sick of all the uncooked produce in the refrigerator, and in a frenzy of industry, I stirfried the bean sprouts, wilted the spinach, and sauteed the mushrooms, wiping out the Dutch oven between batches (fewer dishes). The carrots and potatoes went into K’s slow-cooker chicken curry, and the eggs into a big breakfast scramble with some shredded cheese and leftover barbecue meat. The fridge is now full of easily microwaveable side dishes, instead of produce that demands cleaning and chopping before it can be consumed. In a household with two working parents and kids that need to be fed immediately after coming home in the evenings, this sort of prep is key to retaining sanity.

I am a little disappointed with the bread, though; it crumbled a bit too easily and fell into pieces in the toaster oven. Too dry, I think, even though we carefully kept it twist-tied in its paper bag. Guess I’ll avoid it the next time around.

The bean sprouts were not clearly not a hit with the CSA crowd:

bean sprouts on the trade table

The major pitfall of the bean sprouts is that they go bad really quickly; turn your back for a few days and they’ve gone all brown and slimy, and before you know it you’re throwing away food and feeling horrible about it. Just wash them and eat them raw as a snack or in salads, or stirfry them and eat them alongside, well, practically anything. Their taste is clean, bland, and inoffensive; mix them into your cooking and I guarantee you’ll barely notice their presence.

(…unless you’re a three-year-old. Little Prince has x-ray vision and, if he’s in a mood, he’ll object to even the smallest shred of vegetation in his meals. Except, oddly, broccoli.)

summer CSA, week 2

Week 2 of the Breezy Willow summer CSA: kale (good grief, if you combine this with the end of the spring CSA, this made the third or fourth week straight of kale), zucchini, spring onions, blueberries! delicious blueberries!, bean sprouts, green leaf lettuce, kohlrabi, turnips, eggs, and bread (Breadery ciabatta).

summer CSA, week 2

The zucchini was sliced and sauteed right away to go into lunches. The blueberries, of course, disappeared rapidly, and they would probably have been completely eaten on the very first evening if I hadn’t hidden the rest of the box from the kid. For the kale, I used Cook’s Illustrated recipe for “Blanched Assertive Greens with Bacon and Onion”, which is a constant favorite in our household. The spring onions got chopped up with spring scallions and spring garlic (thank you, East Columbia farmer’s market, for selling me items I didn’t even know existed!), and were sauteed with radish greens and mushrooms (both from last week’s share) in a lovely frittata.

spring mushroom frittata

At least I hope it’s lovely. The filling tasted good, anyway, before I poured eggs and gruyere cheese all over it. The picture looked boring, so to create some contrast, I flipped one slice of it upside-down. “Looks like Pac-Man,” was K’s verdict.

Anyway, frittatas are one of my go-to recipes for using up CSA stuff. Just saute everything, bind it all together with egg and cheese, cook it on the stovetop until the bottom is firm, stick it in the oven until the top is firm. Use a nonstick pan so that it’ll come sliding out easily; serve over rice or with bread. Easy dinner. Or lunch, in this case.

As for the bean sprouts, kohlrabi, and turnips… they’re still in the fridge. I was pondering making latkes with the kohlrabi and turnips, but it hasn’t panned out yet. Alas, the sprouts may not be doing well after all this time. And we’re getting more vegetables this afternoon. At least there isn’t supposed to be any more kale.

furlough ramen

Have you heard of canned Vienna sausages? They’re tiny little cylinders made of a smooth meat paste, so processed that it’s all a uniform color and texture. They’re soft, salty, and squishy on the tongue. My parents always had a few cans around while I was growing up; I was always fascinated by how the seven cylinders fit neatly into a can, and when I was a kid, I enjoyed trying to remove one without damaging the others. The first one was always the hardest.

Vienna sausages

They’re dirt cheap and last forever on the shelf; they don’t even need heating (though heating does help). If I were stocking up food for the apocalypse, I would make sure I had a shelf full of these. But I only had one can at home, bought as a joke a year or two ago.

Last night, as the government shutdown loomed, I decided to embrace frugality and finally use up those Vienna sausages on some ramen (another classic budget food). I also added kale and a poached egg.

furlough ramen

It was surprisingly good. I started by dumping some stock cubes from our freezer into water: mushroom stock, chicken stock, and a smidge of duck stock. Then, when the liquid was at a rolling boil, I dropped in torn kale and cooked it until it was soft but still bright green. Out with the kale and in with the ramen; when the ramen was cooked, it came out as well, and in went eggs and Vienna sausages. The sausages heated in the time it took the eggs to poach.

Okay, it’s not dollar ramen; the noodles were actually thin egg noodles with shrimp eggs. They’re my favorite dried noodle from Lotte. Also, dropping the Vienna sausages in the broth was only meant to warm them, but it actually helped the flavor by washing off the salty brine. And, gourmet ramen and all, I think I fed the family for under five dollars.

fish tacos!

Whenever I think of fish tacos, I remember eating them in San Diego, when we met a friend for dinner by the pier. The place was so crowded and noisy that we were almost certain we wouldn’t get a table, but we squeezed between the patrons and managed to find a place to sit. Salty air blew through the windows from the ocean, and the light changed gradually as the sun set outside. I had a great time. It was the perfect place to eat a fish taco.

So it’s a pity that the tacos themselves were pretty forgettable. Fried and battered fish fillets, probably with lots of shredded cabbage, tomato, and sour cream. Nothing special.

But these fish tacos, homemade in Maryland? They’re so much better. They’re everything the San Diego tacos should have been. And when I eat them, they taste like summer and sunshine.

summery fish tacos

These fish pieces are baked, not fried; however, because they’re individually dredged in flour, they still have a nice dry outer shell. (That was K’s idea; I was just going to broil fish and slice it after. This took a little extra time, but it works so much better.) We didn’t have cabbage and tomatoes aren’t in season, but we used pickled vegetables for crunch (another of K’s brilliant brainwaves) and red bell pepper for color. The result is colorful, delicious, and perfect for summer.

You’ll need:
3 tilapia fillets
flour
cornstarch
oil
1 lemon, cut into wedges (a lime would also work)
1 red bell pepper, sliced small (we would have used tomatoes, but they’re not in season yet)
small corn tortillas
sour cream
pickled carrot and daikon radish
cilantro, washed and roughly torn

Prepare a shallow bowl of equal parts flour and cornstarch. If you want, season this with a little cayenne pepper. In the oven, position a rack about 12″ underneath the broiler element, and set the broiler to HI.

Cover a cookie sheet with tinfoil and oil it lightly.

Cut each tilapia fillet in half lengthwise, then slice it into strips, working against the grain where possible. Dredge these strips in the flour mixture, then lay them on the prepared baking sheet.

Sprinkle some salt and pepper over the strips, and drizzle with lemon juice. Stick the pan underneath the broiler until the fish are done. I just break one apart to see if it’s cooked inside. The outsides will be crispy, and the insides will be white and firm. It won’t take long.

On another pan, stick some tortillas inside the oven to toast. Don’t let them overcook; you want them to be warm and just starting to crisp, but still flexible enough to bend. If you forget they’re in there, you’ll have tortilla chips in no time. (In which case, I suggest making some guacamole.)

To assemble a fish taco: layer fish strips, bell pepper, pickled vegetables, cilantro, and sour cream into a tortilla in whatever order you like. Finish with a squeeze of lemon juice. Enjoy.

spring CSA, week 4

Week 4 of the spring CSA may as well have been subtitled “eat your vegetables.” My goodness, what a lot of green. We are drowning in Napa cabbage now. I think it was supposed to be kohlrabi, but they said they had so much Napa left over that they just kept providing it. It’s ok, I’m not the world’s biggest kohlrabi fan.

In this week’s pickup: Napa cabbage, 3 parsnips, 3 grapefruit, white potatoes, spinach, mixed greens, Brussels sprouts, more bean sprouts, a head of garlic, and bread (Great Harvest old-fashioned white).

spring CSA, week 4

Usually I have no trouble splitting the CSA share, but getting a situation like the 3 parsnips is kind of tragic. You want to split equally, but it’s silly to cut a parsnip in half, so we just go 2 and 1. But you can’t make a proper parsnip-centered dish with just one parsnip. Oh well, I guess it’ll be an extra ingredient in a stew or something.

I was really happy to see the Brussels sprouts, though. They’re one of my favorite cold-weather vegetable dishes, and they’re super quick to roast up. I rinse them, trim off all the dried stem ends, cut each of them in half, and toss them with olive oil, roughly chopped garlic, and salt and pepper.

ready to go in the oven

Purists would take off the outer leaves, but if they look good, I just leave ’em.

Then I pop them into the oven (or even the toaster oven, in this case, since I didn’t feel like turning the big oven on) and let them cook at 400 degrees, tossing them occasionally, until the edges are crispy and brown.

ready to eat!

They’re fabulous like this, crispy on the outside and meltingly soft on the inside. I usually give them another sprinkle of salt, just for good measure, before eating. The chunks of roasted garlic aren’t bad either.

it was delicious! I made it with fish!

A long time ago, while poking around on Allrecipes, I came across one particular review which stuck in my mind. The recipe was for tuna brushed with soy and coated with sesame seeds, lightly seared so that it was cooked on the outside but still raw in the middle; one reviewer gave it five stars and noted: “it was delicious! I made it with chicken tenders!”

Thinking about sesame-coated raw chicken still gives me the shivers.

Anyway, I thought of that review last night when I was making tilapia. I usually make tilapia with lemon and dill, but I had neither. Instead, I had a single tiny lime, and while brainstorming ideas, it occurred to me that Thomas Keller had a truly delectable recipe for creamed corn that involved lime and cayenne pepper. I know, fish and corn are not the same, but it seemed like a decent jumping-off point. Why not try the same flavor combination with fish?

So I did. The fish turned out very good, tangy (lime) and spicy (cayenne) with a lovely creamy background (butter and the tilapia). It’s a very good dish for summer. I gave K a taste when he came home, and he went digging into the leftovers for more. Success!

(As a bonus, this dish is very easy to put together even when a not-so-small infant is rolling around on the kitchen floor, getting underfoot and demanding attention.)

tilapia with lime and cayenne

Tilapia with Lime and Cayenne

Unfortunately I didn’t measure my quantities, so your guess is as good as mine.

Ingredients:
3 tilapia fillets
one small lime, zested and juiced
butter
salt
cayenne pepper

Directions:

Rub three small individual roasting dishes with butter. (Or rub a single big pan with butter.) Sprinkle the fillets lightly with salt on either side, and lay them into the roasting dishes/pan.

Squeeze some lime juice over each fillet and sprinkle with lime zest. I used about half of the juice for three fillets. (I made the rest into limeade.)

Very lightly dust the tops with a little cayenne pepper. Go easy; a little cayenne goes a long way.

Dot the fillets with tiny pats of butter.

Put the roasting pans into the oven, under the broiler. Check occasionally for doneness; when fish is done, it flakes when prodded by a fork. Mine were done with the outer edges were beginning to brown and crisp.

Eat and enjoy! I had my fillet over rice, with buttery drippings poured out of the pan.

summer CSA, weeks 10 and 11

I need to figure out what to do with all this corn.

Week 10 of the CSA: six ears of corn, cantaloupe, kale, green beans, tomatoes, summer squash, peaches, green peppers, and the usual eggs and bread (Great Harvest sourdough). I was pleased to find a vein of parmesan running through the sourdough when I cut it in half.

summer CSA, week 10

A good summer way to eat green beans: trim them (cut or pinch off the stem end), blanch them (cook them in boiling water and then plunge them into ice water to keep the crunch and the bright green color), and then toss them with sesame oil, ponzu sauce, garlic powder, and fresh ground pepper. If you don’t have ponzu, use soy sauce and a squeeze of citrus. Serve alongside, well, anything. Leftovers are also great straight out of the fridge.

Week 11 of the CSA: double corn! (I traded one eggplant for six ears of corn. I don’t usually avail myself of the trade table, but this seemed like too good a deal to pass up.) So: twelve ears of corn, a giant sangria watermelon, onions, tomatoes, cucumbers, white potatoes, and the usual eggs and bread (Great Harvest challah).

summer CSA, week 10

The sangria watermelon is fantastic. Its flesh is dark red, intensely sweet, and incredibly juicy. I cut it up that very night and promptly proceeded to eat so much of it that my stomach felt physically swollen. I also had a grand time spitting seeds into a bowl.

I don’t know why, but a lot of the watermelon in stores these days is seedless, and it makes me sad. I think the best, sweetest bits of the watermelon are nestled softly around the seeds. Besides, one of my favorite memories of summer as a kid was the experience of sitting outside, munching watermelon, and spitting seeds into the grass on a twilight evening. I hope to recreate that experience for my kid one day.